For those on the iOS platform that love to tinker with their iDevice, and who happen to own a pre-A5 device, and use Redsn0w to jailbreak their device you might like to know that there is a new feature been added to Redsn0w, support for jailbreaking iOS 5.1.1 untethered on non-A5 devices using non DFU mode backup/restore method.
The new added feature utilises backup and restore rather than the typical DFU ramdisk method and speeds up the process of jailbreaking on pre-A5 gear that is running iOS 5.1.1. However the iPhone Dev Team have suggested that you check the current state of of your device before attempting to use the non DFU mode because if you have lots of apps, games and such it is better to opt for the DFU mode rather than non DFU.
The pre-A5 backup and restore jailbreak is only available with the latest versions of Redsn0w, and again your iPhone must be running iOS 5.1.1 as it will only work with this iOS version.

For those that would like to give the jailbreak iOS 5.1.1 non DFU mode backup and restore method a whirl, we have a tutorial video of how to accomplish the deed for your viewing consideration below, which comes our way courtesy of iDownload Blog, and only last three minutes, or you can follow the steps below…
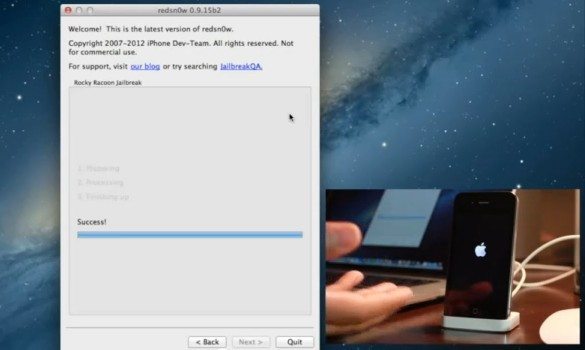
First off make sure you download Redsn0w 0.9.15b2 and then open it, connect your pre-A5 device to your PC and make sure Redsn0w recognises it, and then click jailbreak and you should be give a prompt on what mode you wish to use, and to choose backup and restore you click ‘No’ and the jailbreak should then start.
Next there will be 3 steps, ‘preparing’ ‘processing’ and ‘cleaning up,’ which performs the backup, and then when done the device will enter restore mode. When the restore is done you should see a message stating ‘Restore Complete’ and a pop up on Redsn0w saying the jailbreak is a success, you need to click ‘OK’ on the message and then hit ‘Quit’ to close Redsn0w.
After this your iPhone will respring and show the Apple logo and a loading bar beneath, when the bar is full the lock screen will appear. Do not touch your device but wait a few seconds and the device will again respring, and once the second respring is done you can unlock your handset and Cydia should show on the second home screen, and you are done.
And there you have it, don’t forget to hit that play button below if you prefer to follow the video instructions so you can gain a visual, and if you do have a go feel free to let us know how it all goes by dropping us a line to our comments area below.