Install Android 4.1.2 Jelly Bean Sony Xperia T PACMan Custom ROM

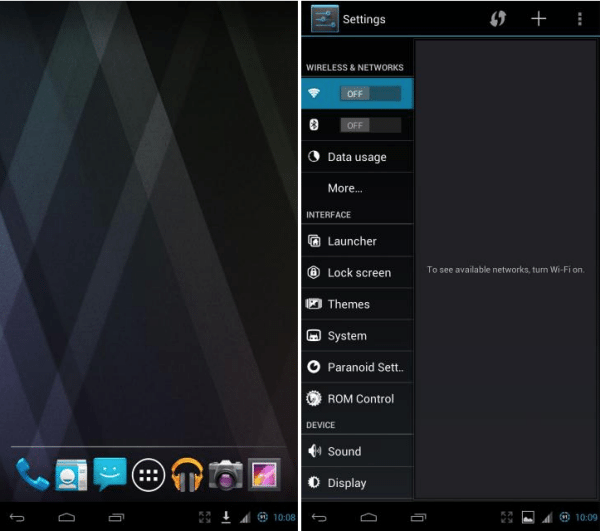
Now Sony Xperia T users can install Android 4.1.2 Jelly Bean PACman custom ROM. It’s an Android Open Source Project (AOSP) based aftermarket firmware. This custom ROM based on CyanogenMod10, AOKP Milestone 1 and Paranoid Android 2.57. Now you can use these three ROM’s features just installing a single ROM.
It comes without the Google and Sony applications. You can install Google apps by installing Gapps zip file. PACMan ROM comes its own kernel. It includes a custom recovery (CWM). In order to start the installation you have to unlock the bootloader.
This installation we don’t need to root and install a custom recovery, as I mentioned earlier after you should install its kernel (boot. img), and then you will receive the CWM based recovery. Though if you have a recovery, it’s not an issue. If you have a custom recovery, you don’t need to use fastboot method to install the kernel, instead of that you can install it via recovery.
Warning!
Installing an aftermarket firmware voids the warranty. If your Sony Xperia T bricked or damage by following this tutorial, we can’t responsible its damages. This method wipes all the user data including your contacts, SMS, installed apps.
Requirements
Unlock the bootloader (Guide in here) – Charge the battery minimum 50% – Install ADB drivers (Guide in here) and Backup user data (Guide in here).
Download
– Android 4.1.2 PAC Man custom ROM for Xperia T in here, Google apps in here, Fastboot files in here.
How to install Android 4.1.2 PACMan custom ROM Sony Xperia T
This installation has two steps. First we need to install its kernel. If you are coming from a stock ROM, you have to follow kernel installation steps. If you are coming from a non-stock ROM such as CM or AOKP, you can skip the kernel installation.
Kernel installation
– Extract the downloaded fastboot zip file to your desktop or anywhere that you wish.
– Extract the downloaded PAC Man ROM contain boot.img file and save it where you saved the fastboot files.
– Then copy the ROM and Google apps zip files to your Xperia T.
– Power off the phone and wait for a few seconds.
– When it completely switches off. Press and hold the “Volume Up” key and connect to your PC via USB cable.
– Sometime you can see fastboot driver installation. Wait until it’s complete.
– Open the fastboot folder.
– Press and hold the “Shit” key and at the same time, right click inside the folder.
– Then you can see the Windows context menu, click “Open command Window” option here.
– Next you can see the Windows command prompt. Type following command line and press the enter key.
fastboot devices
– If your device successfully connected with your PC over fastboot mode, it should display “fastboot devices xxxx”. If not you have to install the adb drivers.
– Then types bellow the command line to install the kernel (boot. img).
fastboot flash boot boot.img
– Now you can see “finished” message.
– Then type following command line to reboot your phone to the recovery.
fastboot reboot
– Now you have installed the PACman kernel. Now you have to boot into the recovery mode. When your Xperia T booting, press and release the Volume Down” key several times.
ROM Installation
Sometime you may follow above kernel installation steps. If so start this ROM installation from 2nd step.
– Reboot the Xperia T.
– When it’s booting, press and release the “Volume” down key several times to boot into the recovery.
– Once you’re in the custom recovery, go to “backup and restore>backup”.
– Then go to “wipe data/factory reset>Yes — Wipe data”.
– Next navigate to “wipe cache partition> Yes – Wipe cache”.
– After that go to “Advanced>Wipe dalvik-cache>Yes — Wipe cache”.
– Go to “install zip from sdcard>Choose zip from sdcard”. Now browse the downloaded PACman ROM zip file and select it.
– Then choose “Yes — Install xxx xxxx.zip”.
– This installation will take several minutes, once it’s completed; again select the downloaded Gapps zip file and install it.
– After you have installed ROM and Gapps zip files go back to the CWM main menu.
– Select “reboot system now”.
– Normally the first boot takes several minutes.
– Congratulation, you have just installed the Android 4.1.2 jelly bean PACman ROM on Sony Xperia T.
About author!
This post written by the Chris on the Android Gadgematic blog.

Comments
One thought on “Install Android 4.1.2 Jelly Bean Sony Xperia T PACMan Custom ROM”
my xperiaT has just downloaded the new software jelly bean and it has messed up my phone so bad, all my apps are frozen and i have to tap the app icons repeatedly in order for them to select,is this a error on your part or is it my phone whats broken? please advise my email is beng.1987@hotmail.co.uk