If you haven’t been living under a rock, you might’ve probably heard of Prisma, the photo editing app that has taken the world by storm. You might’ve already seen tons of photos on Instagram and Facebook with the Prisma watermark on the bottom right corner. Have you ever wanted to get one of your photos turned into an amazing artwork? If your answer is yes, you’ve come to the right place. Here is our guide to download and install Prisma and turn your photos into jaw-dropping artworks.
Downloading Prisma is easy as pie. You can download it from the Play Store if you use an Android phone. If you are using an iPhone, you can download it from the Apple Store. Both of these links are given below.

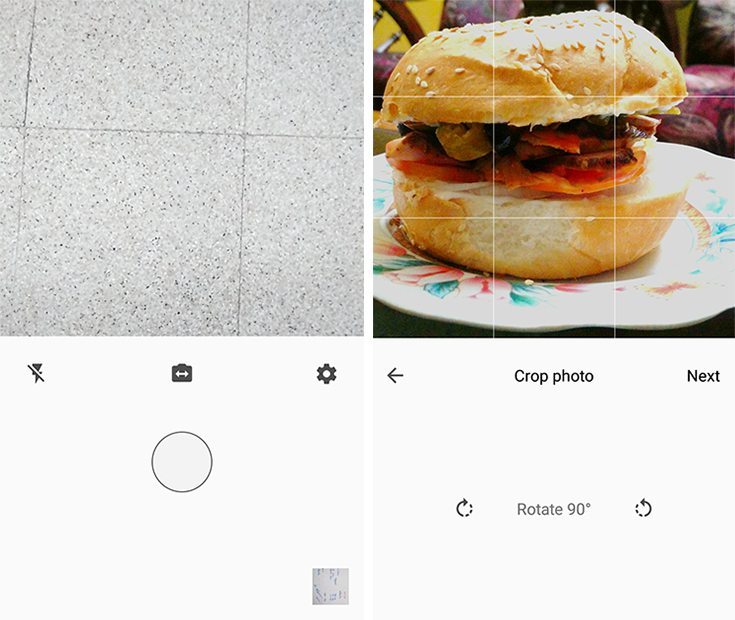
Installing is an easy process and will take care of itself. Now comes the fun bit. All you have to do is launch the app and select one your photos from the bottom right corner. If you don’t have any of your photos, you can simply click on the shutter button to take one right away.
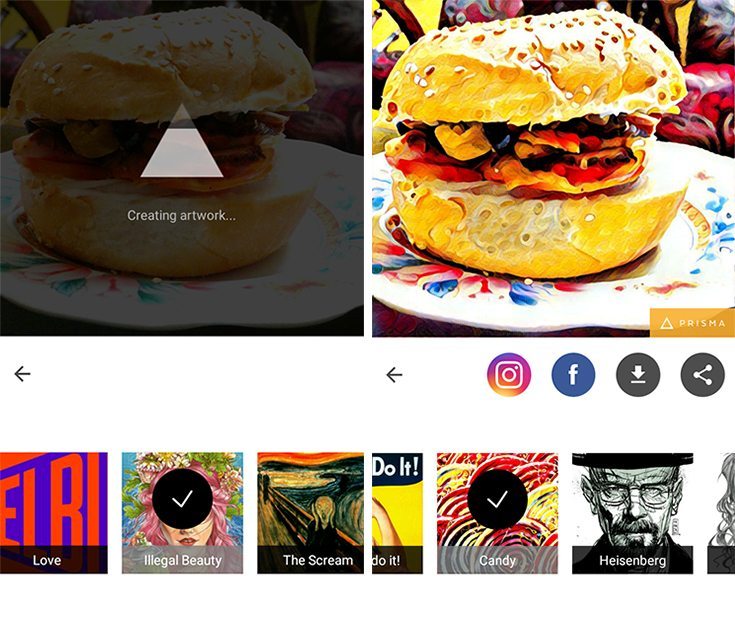
The settings button will allow you to alter options like saving original photos, saving the artworks automatically and adding the watermark. After you’re done selecting the photo, you have the option to rotate it and crop it. Finally, after you hit next, you’ll be treated to an array of filters.

Select the filter of your choice and let Prisma do its magic. It’ll take some time for it to process the picture and you’ll be left with an amazing artwork of your original photo. There is a slider which can be accessed by swiping left or right on the picture to decrease or increase the intensity of the filter. You can directly upload the final picture to Facebook or Instagram. Alternately, you can save it your phone as well as share it by other means. So go on, get yourself some amazing photos with Prisma. If you have any queries about Prisma, do let us know in the comments section below!
